 minute to read

Now all that’s left to do is plug in the new Raspberry Pi 5, right? Well, yes—but I ran into far more mishaps and failures than I would have liked. Recap: The Current Monitoring
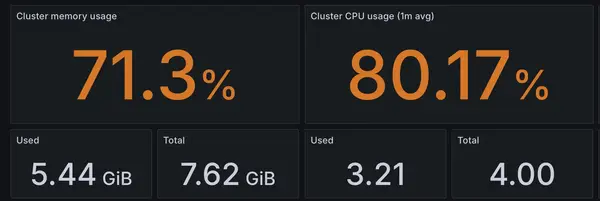
We’re out of CPU and memory. With a second node, we should see double the available resources.
I started by installing Ubuntu Server on a microSD card and plugging in the RPi5. So far, so good. Then, I installed microk8s and the latest updates. A bit of network configuration, and the RPi was ready to go.
I got the RPi5 as part of a special offer, which included a microSD card and a cooling kit—but, strangely, no power supply. Mounting the fan was easy enough, though I installed it the wrong way on my first attempt. I had to remove it with pliers, which briefly made me panic when the RPi refused to boot afterward. Had I damaged something?
It turns out the RPi5, especially with the fan attached, draws significantly more power than the RPi4. The small USB wall plug I was using simply didn’t provide enough power for it to start.
This led me to a second issue: my home lab’s multi-socket power strip was completely full. No available slots meant I had two choices—buy another power strip or get a new adapter that could power multiple RPis.
At this point, I also remembered a key lesson: never plug all your devices into a single power strip. Overloading it could start a fire, and if one power adapter fails, it could send a spike through the strip, potentially damaging everything.
But how much power does my home lab actually need? That depends on load:
I don’t have the equipment to verify these numbers, but others have tested and reported similar results. In total, that means I need roughly 25W at full load. On idle, my setup only sips about 10W.
To run both RPis from a single adapter, I needed at least 20W across two USB outputs. That ruled out most phone chargers, but plenty of laptop power supplies fit the bill. I went with the Anker 335 USB charger—67W split across three outputs, giving me ample headroom.
(And no, I’m not at risk of burning down my house—wall outlets and my power strip are rated for much higher loads.)
I had an elaborate plan to get everything online without any downtime for the blog, despite needing to rewire some devices:
Phase One went smoothly—the RPi5 was configured, and with a simple microk8s join command, I had a second node in my cluster. At this stage, the cluster wasn’t yet set to load-balance existing pods, but a full resync via ArgoCD distributed the deployments evenly across both nodes.
Next, I manually verified that the blog and Cloudflare tunnel were running on the new RPi5, then pulled the plug on the RPi4… and the blog stayed online!
But I had overlooked something—ArgoCD and my dashboards went offline. Oops.
Thankfully, swapping the power plug was as simple as expected. Within a minute, the cluster was fully back online.
Now, I just needed to do the same with the RPi5. I unplugged it, but I had forgotten to check if the blog software was running on both devices. Turns out: while I had two blog pods running (one on each device), the Cloudflare tunnel was only running on the RPi5.
So, pulling the plug killed the blog.
Luckily, my self-inflicted outage only lasted 40 seconds—the time it took for the RPi5 to reboot and restart the Cloudflare tunnel.
Now that both nodes were online, I could monitor resource allocation at two levels:
Since the cluster view only reports cluster-wide services, the numbers wouldn’t always match the per-node statistics.
But it was worth it: I now had a true cluster, with two nodes working in tandem.
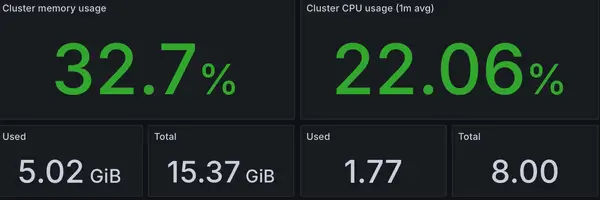
The improvements were immediate:
Interestingly, absolute resource usage also dropped, though the biggest gain was doubling my available headroom.
Initially, the services weren’t running on the secondary node:
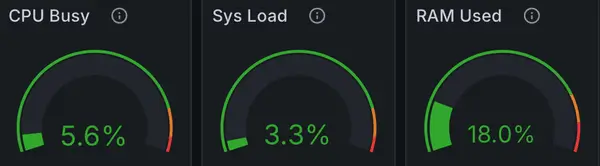
After balancing the cluster:
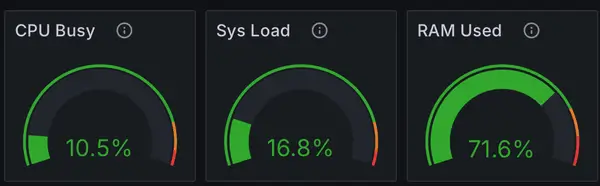
This seemed concerning at first—wasn’t memory usage supposed to drop? But in reality, services are now evenly split. If one node gets congested, Kubernetes can move workloads to the other node, ensuring better responsiveness instead of forcing everything to fight for resources.
Remember that special offer microSD card? Turns out, it only has 32GB of storage. Not a huge issue—all service data is stored on the NAS—but Kubernetes stores its container images locally, and my cluster has roughly 20GB of images. That leaves very little room for the OS and system processes.
To make things worse, while Kubernetes doesn’t use swap space, the RPi performs noticeably better with it.
So, an upgrade is needed. Meaning there will be a Plug Day 2 soon, hopefully with fewer surprises.
With the reduced CPU load, the overheating issue on my primary node is gone.
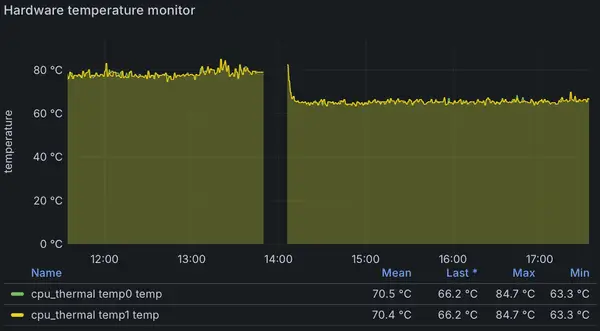
At the start, my RPi4 was running dangerously close to 80°C, just 5°C away from thermal throttling. After unplugging it and balancing the cluster, it cooled to a much more reasonable 65°C.
Meanwhile, the RPi5 sits comfortably at 50°C under similar CPU usage—so the cooling kit was definitely worth it.